The Cozy Magic of Butternut Squash Dip (and Why Your Snack Game Needs It)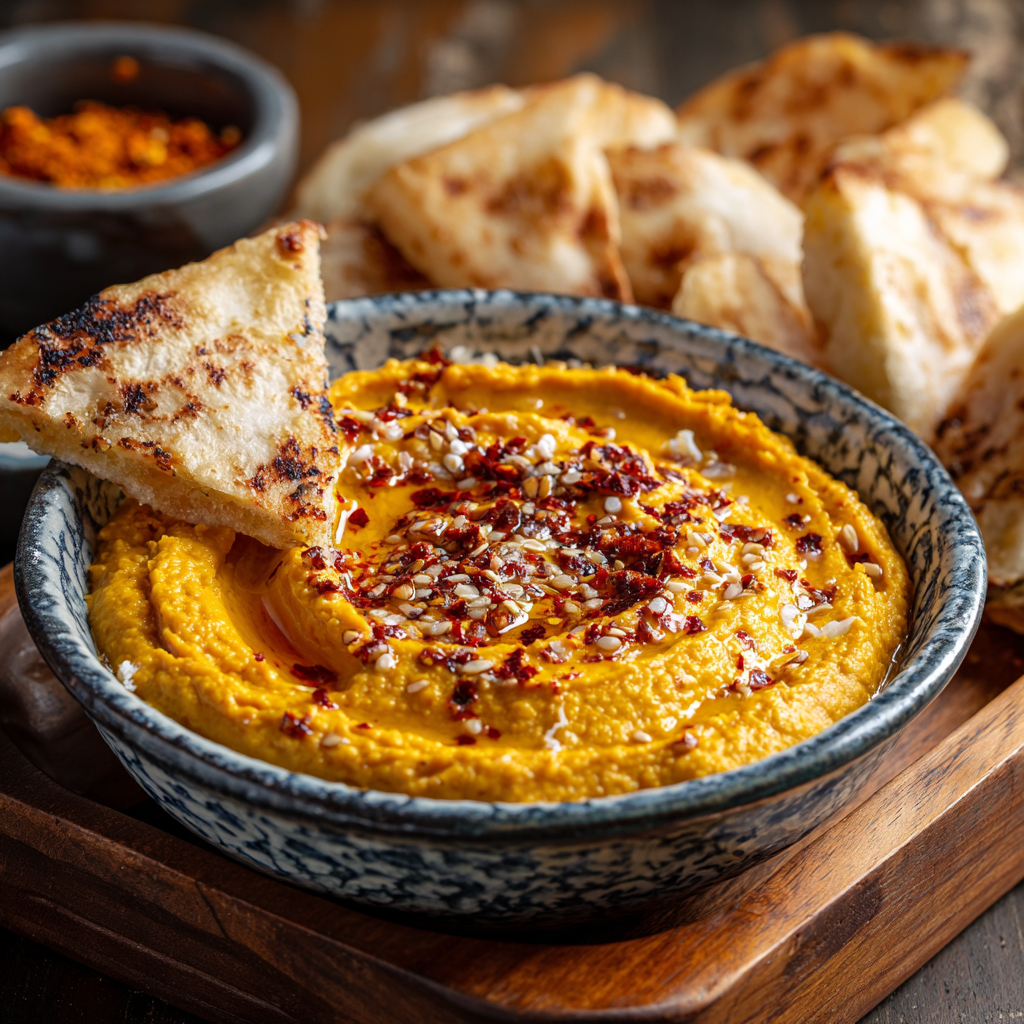
Hey friends! Mason here, back at our digital kitchen table with a secret weapon for your next gathering – or honestly, just your Tuesday night. Picture this: creamy, golden butternut squash swirled with smoky roasted garlic, kissed with lemon and tahini, and finished with a spicy little wink of chili. This Butternut Squash Dip with Air Fryer Roasted Garlic isn’t just a recipe; it’s a hug in a bowl. And the best part? It comes together in 30 minutes flat thanks to our trusty air fryer and a sneaky shortcut (canned squash pureé – shhh!). No peeling massive squash warriors or roasting pans hogging the oven. Just velvety, flavor-packed bliss perfect for crusty bread, crunchy veggies, or my personal favorite – eaten straight off a spoon during “quality control” checks. Whether you serve it chilled like a sophisticated spread or warm it up into molten, cheesy heaven, this dip is your ticket to effortless, crowd-pleasing magic. Ready to make your taste buds dance? Let’s grab that air fryer!
A Garlicky Revelation & My First Kitchen Meltdown
PrintButternut Squash Dip with Air Fryer Roasted Garlic

Creamy, earthy, and bursting with bold flavor—this Butternut Squash Dip with Air Fryer Roasted Garlic is a cozy, crave-worthy appetizer. With tahini, lemon, and a kick of spice, it’s perfect as a chilled dip or warmed up with melty cheese for extra indulgence.
- Prep Time: 10 minutes
- Cook Time: 20 minutes
- Total Time: 30 minutes
- Yield: 6 1x
Ingredients
1 (15 oz / 425g) can organic butternut squash purée
2 tbsp extra-virgin olive oil, plus more for drizzling
Coarse sea salt to taste
1 large garlic head (top ¼” cut off to expose cloves)
Juice of ½ lemon
2 tbsp tahini
1 tsp turmeric
Cayenne pepper and red chili flakes to taste
Optional: 1 cup shredded cheese (for warm version)
Instructions
Roast the garlic: Preheat air fryer to 375°F (190°C). Drizzle cut garlic head with olive oil and wrap in foil. Air fry for 15–20 minutes until soft and golden.
Let garlic cool slightly, then squeeze roasted cloves into a food processor.
Add squash purée, olive oil, lemon juice, tahini, turmeric, and spices. Blend until smooth and creamy.
Taste and adjust salt, spice, and lemon as desired.
Optional: For a warm version, mix in shredded cheese and heat in a skillet or microwave until melted and gooey.
Serve drizzled with olive oil and a sprinkle of chili flakes.
Notes
Vegan, gluten-free, and nutrient-rich
Nutrition
- Calories: 120 kcal
- Fat: ~8g
- Carbohydrates: 10g
- Fiber: 3g
This dip actually started as a happy accident during my first “real” dinner party years ago. I’d ambitiously planned an elaborate squash soup but completely underestimated how long roasting whole squash takes. Panic mode! With guests arriving in 30 minutes, I spotted canned butternut pureé hiding in the pantry. Desperation led to experimentation: I blitzed it with tahini and lemon, but something was missing. Then I remembered the head of garlic I’d air-fryer-roasted earlier for bread (my then-new obsession). I squeezed those caramelized cloves in, gave it a whirl, and BAM – kitchen salvation! The earthy sweetness of the squash melded with the deep, nutty roasted garlic in a way that felt luxurious yet comforting. My guests raved, thinking it was some gourmet plan all along. Little did they know it was born from my near-meltdown! That night taught me a golden rule I still live by: sometimes the most unforgettable flavors come from the “oops” moments and the simple, smart shortcuts. This dip? It tastes like triumph.
Your Flavor Squad: Simple, Bold Ingredients
- 1 (15 oz / 425g) can organic butternut squash purée: Our superstar shortcut! Look for pure purée (no added sugar/spices). Chef’s Insight: Using canned saves an hour+ of roasting and peeling – genius for flavor without fuss.
- 2 tbsp extra-virgin olive oil, plus more for drizzling: Adds richness and helps blend everything silkily. Sub Tip: Avocado oil works great too!
- Coarse sea salt to taste: Start with ½ tsp – it makes every other flavor pop!
- 1 large garlic head (top ¼” cut off to expose cloves): The game-changer! Air-frying transforms it into sweet, mellow magic. Chef’s Note: Pick a firm, plump head.
- Juice of ½ lemon: Brightens everything up. Pro Hack: Roll the lemon on the counter first to maximize juice!
- 2 tbsp tahini: Adds nutty depth and creamy texture. Sub Tip: Runny natural peanut butter works in a pinch.
- 1 tsp turmeric: Gives gorgeous color and warm earthiness. Chef’s Insight: It’s anti-inflammatory too – bonus points!
- Cayenne pepper and red chili flakes to taste: Start with ¼ tsp cayenne & ½ tsp flakes for gentle warmth. Adjust for your spice love!
- Optional: 1 cup shredded cheese (for warm version): Mozzarella, cheddar, or Monterey Jack turn it into molten joy. Chef’s Pick: Smoked gouda adds amazing depth!
Let’s Build That Dip! (Air Fryer Heroics Included)
Step 1: Roast That Garlic! Preheat your air fryer to 375°F (190°C). Place your trimmed garlic head on a small square of foil. Drizzle it generously with about 1 tsp olive oil, making sure it seeps into the cloves. Wrap it up snugly like a little garlic present. Air fry for 15-20 minutes. Chef’s Hack: Give the foil packet a gentle squeeze at 15 minutes. If it feels very soft inside, it’s done! Let it cool slightly – burnt fingers are *not* a good seasoning.
Step 2: Squeeze & Release! Unwrap your garlic (careful, it’s hot!). Once cool enough to handle, hold the base and squeeze the softened cloves directly into your food processor bowl. It should ooze out like fragrant, golden paste. Discard the papery skin. Pro Tip: Use the back of a spoon to press out stubborn cloves. Every bit is flavor gold!
Step 3: The Big Blitz! Add the entire can of butternut squash pureé, 2 tbsp olive oil, lemon juice, tahini, turmeric, cayenne, chili flakes, and your starting ½ tsp salt to the food processor with the roasted garlic. Secure the lid tightly. Blend on high for a full 1-2 minutes, stopping to scrape down the sides once. Chef’s Secret: This long blend is KEY for ultra-silky texture! You want it perfectly smooth and vibrant.
Step 4: Taste & Tweak! Stop the processor. Grab a spoon and TASTE! This is your moment. Needs more zip? Add a touch more lemon. More warmth? A pinch more cayenne. More depth? A tiny bit more salt. Blend again for 10 seconds after each adjustment. Golden Rule: Seasoning is personal – make it sing for YOU!
Step 5: Go Chilled or Gooey! (Optional Warm Cheesy Version) Chilled & Sophisticated: Transfer the dip to a bowl, cover, and chill for at least 30 minutes for flavors to mingle. Warm & Indulgent: Stir in your shredded cheese right in the food processor (pulse briefly just to combine, don’t overblend). Transfer to an oven-safe skillet or microwave-safe bowl. Heat gently in the microwave (stirring every 30 sec) or in a 350°F oven (about 10-15 mins) until bubbly and melty. Chef’s Hack: Microwave + broiler combo: Microwave to melt, then broil for 1-2 mins for a gorgeous bubbly top!
Step 6: The Grand Finale! Transfer your dip (chilled or warm) to a serving bowl. Drizzle generously with your best olive oil. Sprinkle with an extra pinch of red chili flakes for color and kick. Pro Move: Add a sprinkle of smoked paprika or fresh thyme leaves for extra flair!
Serving Up the Good Stuff
Presentation is part of the fun! Scoop your glorious golden dip into a wide, shallow bowl – it shows off that beautiful color and drizzle. For chilled, surround it with a vibrant halo: pita chips, sturdy crackers (like seeded rye or baguette slices), cucumber rounds, bell pepper strips, and carrot sticks. For the warm, cheesy version, serve it right in the warm skillet (warn guests it’s hot!) with crusty bread for dipping and schmearing. A little bowl of extra chili flakes on the side lets everyone customize their heat level. Perfect with a crisp white wine or a hoppy IPA!
Mix It Up! Flavor Adventures
This dip is a dream canvas! Try these tasty twists:
- Smoky Chipotle: Swap cayenne for 1 tsp chipotle powder + 1 tbsp adobo sauce from the can. Hello, campfire vibes!
- Maple Walnut: Add 1 tbsp pure maple syrup to the blend. Top chilled version with toasted, chopped walnuts. Sweet & earthy bliss.
- Mediterranean Herb: Stir in 2 tbsp chopped fresh parsley, dill, or basil after blending. Top with crumbled feta and Kalamata olives.
- Protein Power: Stir in ½ cup rinsed, drained chickpeas before blending for extra fiber and heartiness (add a splash more oil/lemon if needed).
- Dairy-Free Creamy: For the warm version, use ½ cup nutritional yeast + 2 tbsp coconut cream instead of cheese for cheesy flavor without dairy.
Mason’s Musings & Kitchen Confessions
This recipe has evolved more than my music taste since that first panic-induced batch! I started roasting squash from scratch (respect, but nah), tried roasting the garlic in the oven (took forever and heated the whole kitchen), and even experimented with adding apples (weirdly good, but not today’s vibe). The air fryer roasted garlic? TOTAL game-changer. It’s faster, more consistent, and doesn’t make my tiny apartment feel like a sauna. I also learned the hard way: DO NOT skip blending for a full 2 minutes. That patience is what turns it from “good” to “holy-wow-is-this-really-canned-squash?!” silky perfection. One funny fail involved accidentally using pumpkin pie spice instead of turmeric… let’s just say it tasted like Thanksgiving dessert trying VERY hard to be savory. Stick with the turmeric! This dip is now my ultimate potluck weapon, my Netflix-binge companion, and proof that sometimes the simplest tricks yield the biggest flavor payoffs.
Your Dip Dilemmas, Solved!
Q: My dip tastes bland. Help!
A: Fear not! Blandness usually needs more SALT or ACID. Add another pinch of salt and/or a squeeze more lemon juice. Blend and taste. Often that’s all it needs! Also, ensure your spices (especially cayenne/turmeric) are fresh – they lose potency over time.
Q: Why is my dip too thick/gummy?
A: Canned squash pureé brands can vary in moisture. If it’s super thick after blending, thin it out gradually: add 1 tsp of warm water, olive oil, or even a splash of unsweetened almond milk at a time while blending, until it reaches your perfect creamy-dip consistency. Go slow!
Q: Can I make this ahead?
A: Absolutely! The chilled version is PERFECT made 1-2 days ahead. Store it covered in the fridge – the flavors actually get better! For the warm cheesy version, make the base dip ahead (without cheese), refrigerate, then stir in the cheese right before heating and serving.
Q: No air fryer? Can I roast the garlic?
A: You bet! Preheat your oven to 400°F (200°C). Prep the garlic the same way (trim, oil, wrap in foil). Roast for 40-50 minutes until super soft. Let cool before squeezing. It takes longer, but the flavor payoff is still amazing!
Nourishment Notes (Goodness in Every Scoop!)
This vibrant dip is naturally vegan, gluten-free, and packed with goodness (before adding optional cheese). Butternut squash is loaded with Vitamin A (hello, bright eyes!), fiber, and antioxidants. Garlic offers immune support, turmeric brings anti-inflammatory benefits, and olive oil provides healthy fats. It’s a nutrient-dense snack or appetizer you can feel great about sharing!
Per Serving (approx ⅙ of recipe, without cheese): Calories: ~120 kcal | Fat: ~8g | Carbs: ~10g | Fiber: ~3g | Protein: ~2g

Final Thoughts
This Butternut Squash Dip is what I like to call “snack sophistication meets cozy comfort.” It’s silky, soulful, and secretly smart—pulling off the impossible combo of weeknight ease and dinner-party wow. Whether you’re scooping it warm with crusty bread or spreading it cool onto crackers during movie night, this dip brings big flavor energy with minimal effort. It’s proof that pantry staples, an air fryer, and a little kitchen improvisation can work actual magic.
So next time your snack game needs a glow-up, skip the store-bought hummus and whip up this golden bowl of joy instead. Your taste buds (and your guests) will thank you.