Hey There, Hungry Friend! Pull Up a Chair…
Picture this: It’s been *one* of those days. The kind where your feet ache, your brain feels like overcooked noodles, and the mere thought of tackling a mountain of dishes after cooking makes you want to hide under the duvet with a bag of chips. We’ve all been there, right? That’s exactly why this Easy Chicken Cobbler Dinner Casserole exists. Forget fancy techniques or hunting down obscure ingredients – this is pure, unadulterated comfort food magic, all baked up in one glorious dish. Think juicy shredded chicken and tender veggies swimming in a creamy, savory gravy, topped with a cloud-like, cheesy biscuit topping that bakes up golden and irresistible. It’s like a cozy hug for your taste buds and a high-five to your future self for making dinner so dang easy. Dump, bake, devour. That’s the motto here. Whether it’s a frantic Wednesday or a lazy Sunday feast with your crew, this cobbler casserole delivers big flavor with minimal fuss. So, grab your trusty 9×13 dish, preheat that oven, and let’s make something that tastes like home (without the stress). Ready to dive in? Let’s roll!
Why This Dish Feels Like Home (And Maybe a Little Chaos)
PrintEasy Chicken Cobbler Dinner Casserole

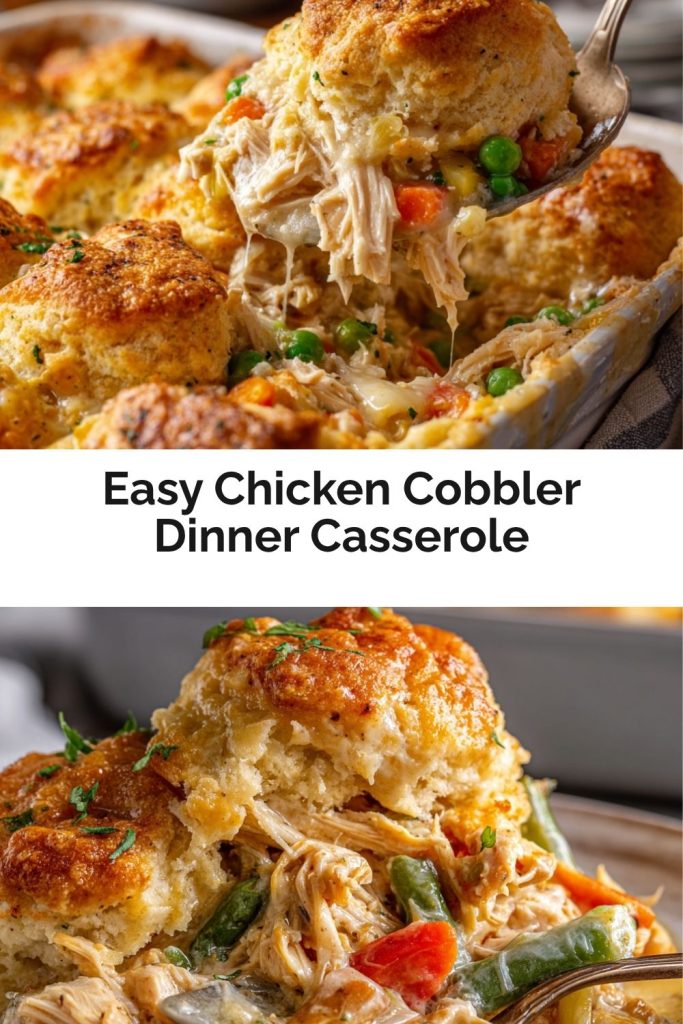
This savory twist on cobbler is a cozy, creamy, cheesy dream layered with juicy shredded chicken, tender vegetables, and fluffy biscuit topping. It’s a one-dish wonder that feels like a warm hug after a long day. Dump, bake, and dig in—dinner just got deliciously simple.
- Prep Time: 10 minutes
- Cook Time: 45–50 minutes
- Total Time: ~1 hour
- Yield: 8 1x
Ingredients
½ cup butter (1 stick), melted
• 4 cups cooked shredded chicken (rotisserie works great)
• 1 (12 oz) bag frozen mixed vegetables
• 1 (11.36 oz) box Red Lobster Cheddar Bay Biscuit Mix
• 2 cups whole milk
• 1 (14.5 oz) can chicken broth (or 2 cups)
• 1 (10.5 oz) can cream of chicken soup
• Seasonings to taste (suggested: garlic powder, onion powder, black pepper)
Instructions
Preheat oven to 350°F (175°C).
Melt butter and pour it into a 9×13-inch baking dish.
Layer the shredded chicken evenly over the butter.
Spread the frozen vegetables over the chicken.
In a bowl, combine biscuit mix (without the seasoning packet) with milk. Stir until smooth, then pour over the chicken and veggies—do not stir.
In another bowl, whisk together chicken broth, cream of chicken soup, and seasoning. Pour this gently over the top—again, do not stir.
Bake uncovered for 45–50 minutes, or until golden brown and bubbly.
Let rest for 5–10 minutes before serving.
Nutrition
- Calories: 430
- Sodium: 950mg
- Fat: 23g
- Carbohydrates: 30g
- Fiber: 3g
- Protein: 28g
This casserole? Oh, it’s got roots. Deep, delicious roots tangled up with my early days of figuring out this whole “feeding myself” thing. I remember a particularly… *adventurous*… rainy Sunday years ago. I’d ambitiously planned an elaborate roast chicken dinner for friends. Spoiler: the chicken was… let’s say, “well-rested” (read: dry), the potatoes were stubbornly crunchy, and my confidence was wilting faster than spinach in a hot pan. Desperate to salvage the gathering (and the leftover chicken!), I started dumping things into a baking dish – leftover shredded bird, frozen peas and carrots from the freezer’s depths, a can of soup, some broth, and topped it all with a half-mixed packet of cheddar biscuit mix I found hiding behind the oats. I shoved it in the oven, crossed my fingers, and prayed. What emerged wasn’t just edible; it was a revelation! Golden, puffy, bubbling, and smelling like pure comfort. My friends devoured it, raving about the “amazing casserole.” That chaotic kitchen rescue mission taught me a valuable lesson: sometimes the *best* meals are born from simplicity, necessity, and a little bit of happy accident. This recipe is my polished-up love letter to that moment – proof that delicious doesn’t have to be difficult.
Gathering Your Flavor Arsenal (It’s Easier Than You Think!)
Here’s the beautiful part: this cozy masterpiece comes together with pantry and fridge staples. Let’s break down the team players:
- ½ cup (1 stick) butter, melted: The flavor foundation! It creates a luscious base for the chicken and helps the topping get irresistibly golden. Chef Tip: Salted butter adds a nice depth, but unsalted works perfectly too – just adjust your final seasoning if needed.
- 4 cups cooked shredded chicken: The star protein! Rotisserie chicken is the ultimate weeknight hero here – juicy, flavorful, and zero extra cooking. Substitution Savvy: Leftover roasted turkey or even shredded cooked pork works wonderfully too.
- 1 (12 oz) bag frozen mixed vegetables: The veggie boost! Peas, carrots, corn, green beans – a classic mix adds color, texture, and nutrients without any prep. Flavor Explorer: Swap in frozen broccoli florets or a “California blend” for a different vibe!
- 1 (11.36 oz) box Red Lobster Cheddar Bay Biscuit Mix: The magic topping maker! We’re using just the *dry mix* for now (save that seasoning packet for sprinkling on popcorn later!). Insight: This mix gives that signature fluffy, slightly cheesy biscuit texture we love. If unavailable, any similar “complete” buttermilk biscuit mix (like Bisquick) works, though you might add 1/2 cup shredded cheddar cheese to mimic the cheesy goodness.
- 2 cups whole milk: Creates the rich, pourable biscuit batter. Substitution Savvy: 2% milk works in a pinch, but whole milk gives the topping the best richness and rise.
- 1 (14.5 oz) can chicken broth (or 2 cups): Forms the base of our savory gravy. Chef Tip: Low-sodium broth gives you more control over the final salt level.
- 1 (10.5 oz) can cream of chicken soup: The secret to creamy, luscious texture! It thickens the filling beautifully. Flavor Explorer: Cream of mushroom or celery soup can add a fun twist.
- Seasonings to taste: The personal touch! Suggested Squad: Garlic powder, onion powder, black pepper. Chef Tip: Start with 1 tsp each garlic and onion powder, and 1/2 tsp black pepper. Taste the broth/soup mixture before pouring and adjust! A pinch of dried thyme or a dash of paprika are also lovely additions.
Let’s Build This Comfort Masterpiece (Step-by-Step!)
- Preheat & Prep: Crank that oven to 350°F (175°C). This ensures it’s perfectly hot when your casserole goes in for even cooking. Grab your trusty 9×13-inch baking dish – no greasing needed!
- Butter Up: Melt your butter (microwave or stovetop is fine!). Pour it directly into the bottom of your baking dish, swirling it around a bit. This isn’t just flavor; it helps prevent sticking and creates a delicious base for the chicken. Chef Hack: Use the wrapper from the butter stick to lightly grease the top edges of the dish if you’re worried about overflow browning too much.
- Chicken Layer: Evenly scatter your shredded chicken over the melted butter. Don’t pack it down tightly – just let it rest comfortably in its buttery bath. Tip: If using rotisserie, take a minute to pick out any large pieces of cartilage or skin.
- Veggie Power: Dump the entire bag of frozen mixed veggies right over the chicken layer. Spread them out evenly. No need to thaw! They’ll cook perfectly during baking. Flavor Boost: Sprinkle a tiny pinch of salt and pepper over the veggies now if you like.
- Biscuit Batter Bliss: In a medium bowl, combine the dry biscuit mix ONLY (remember, save that seasoning packet!) with the 2 cups of whole milk. Whisk or stir vigorously until you have a smooth, slightly thick batter with no big lumps. Pour this batter evenly over the chicken and veggie layers. Here’s the key: DO NOT STIR! Let it sit right on top.
- Savory Sauce Symphony: Grab another bowl (or rinse the first one!). Whisk together the chicken broth, cream of chicken soup, and your chosen seasonings (garlic powder, onion powder, black pepper – start with my suggested amounts!). Whisk until smooth and well combined. Now, gently pour this mixture evenly over the biscuit batter layer. Again, the golden rule: DO NOT STIR! It will look layered and maybe a bit messy – that’s perfect! The magic happens in the oven as the liquids mingle and the batter rises through to form that amazing topping.
- Bake to Golden Perfection: Carefully slide the dish into your preheated oven. Bake uncovered for 45-50 minutes. You’re looking for a deep golden brown biscuit topping, the filling bubbling enthusiastically around the edges, and the center looking set (not jiggly liquid). Chef Hack: Rotate the dish halfway through baking for even browning, especially if your oven has hot spots.
- Rest is Best: Once gloriously golden and bubbly, pull the casserole out. This is crucial: LET IT REST for 5-10 minutes before digging in. This allows the filling to thicken up slightly (so it’s not soup!) and makes serving much easier. Patience Pays Off: Trust me, it’s worth the wait! The aroma will be torture, but resist!
Plating Up Pure Comfort (Keep it Simple!)
This casserole is a complete meal superstar all by itself, needing little fanfare. Use a large spoon or serving spatula to scoop down through the fluffy biscuit topping and into the creamy chicken and veggie filling below. Serve generous portions right into shallow bowls – they cradle the saucy goodness perfectly. If you’re feeling fancy (or just extra hungry!), a simple side salad with a bright vinaigrette cuts through the richness beautifully. A sprinkle of fresh chopped parsley adds a pop of color and freshness, but honestly? A big spoon and a happy sigh are the best garnishes here.
Make It Your Own! Delicious Twists on the Classic
This recipe is a fantastic canvas for your culinary creativity! Here are a few easy spins:
- Cheesy Explosion: Stir 1 cup of shredded sharp cheddar cheese into the chicken/veggie layer before adding the biscuit batter. Top the casserole during the last 5 minutes of baking with another 1/2 cup cheese for maximum gooeyness.
- Southwest Fiesta: Swap the mixed veggies for frozen corn and black beans (drained and rinsed). Add 1 tsp chili powder and 1/2 tsp cumin to the broth/soup mixture. Top baked servings with a dollop of sour cream, salsa, and fresh cilantro.
- Creamy Mushroom & Herb: Use cream of mushroom soup instead of chicken. Add 1 cup sautéed sliced mushrooms to the chicken layer and stir 1 tbsp chopped fresh thyme or rosemary into the broth/soup mix.
- Lighter Touch: Use low-sodium broth, reduced-fat cream of chicken soup, and swap half the butter for olive oil. Opt for 2% milk and a lower-fat biscuit mix if available.
- BBQ Chicken Cobbler: Mix 1/2 cup of your favorite BBQ sauce into the shredded chicken before layering. Use cream of celery soup for the broth mixture. The sweet & savory combo is incredible!
Mason’s Musings: A Dish That Grows With You
This casserole has been a constant in my kitchen journey, evolving from that chaotic salvage operation into a reliable, beloved staple. It’s the recipe I text to friends moving into their first apartment, the one I bring to new parents, and my absolute go-to when I need a guaranteed crowd-pleaser with minimal effort. Over the years, I’ve learned a few things: Don’t stress about perfectly even layers – the oven works its magic! Embrace the frozen veggies – they’re the unsung heroes of busy cooks. And that “DO NOT STIR” instruction? It’s not just a suggestion; it’s the secret to achieving that perfect textured topping that’s part biscuit, part dumpling, and 100% delicious. I once (accidentally!) used the *entire* Red Lobster biscuit mix *including* the seasoning packet in the batter. Verdict? Surprisingly delicious, but VERY garlicky/oniony! Maybe try it intentionally if you’re feeling bold? Mostly, this dish reminds me that cooking is about connection, ease, and joy. It doesn’t have to be perfect; it just has to be made (and eaten!) with heart.
Your Cobbler Questions, Answered!
Q: My biscuit topping sank/is dense! What happened?
A: The most common culprit is stirring after adding the layers. Remember: DO NOT STIR after adding the biscuit batter or the broth mixture! Stirring mixes the wet and dry components too soon, preventing the batter from rising properly through the liquid to form the distinct topping. Also, ensure your baking powder in the biscuit mix isn’t expired, and make sure your oven is fully preheated.
Q: Can I make this ahead of time?
A: Absolutely! Assemble the casserole completely (through step 6) in the baking dish. Cover tightly with plastic wrap or foil and refrigerate for up to 24 hours. When ready to bake, remove it from the fridge while preheating the oven (about 20-30 minutes). You may need to add 5-10 minutes to the baking time since it’s starting cold. Do not freeze the assembled raw casserole – the biscuit batter won’t perform well.
Q: The filling seems too runny/liquidy after baking. Help!
A: First, ensure you let it rest for the full 5-10 minutes – it thickens significantly as it cools slightly. If it’s still very soupy, it might be underbaked. Pop it back in the oven for 5-10 minute intervals until the center is bubbling hot and looks more set. Using low-sodium broth? The salt helps thicken slightly – ensure your seasonings are adequate. Finally, double-check you used the correct amounts of broth and soup.
Q: Can I use fresh vegetables instead of frozen?
A: You can, but they need pre-cooking! Frozen veggies are par-cooked and release less water during baking. If using fresh veggies (like diced carrots, peas, green beans), lightly steam or sauté them until just tender-crisp before adding to the casserole. Raw veggies won’t cook through in time and might release too much water, making the filling runny.
Nutritional Info (Per Serving, Makes 8 Servings)
Calories: ~430 | Protein: 28g | Carbohydrates: 30g | Fat: 23g | Fiber: 3g | Sodium: ~950mg
Prep Time: 10 min | Bake Time: 45-50 min | Total Time: ~1 hour
Note: Nutritional values are estimates and can vary based on specific ingredients used (e.g., rotisserie chicken seasoning, exact biscuit mix, low-sodium options).
Final Thoughts
There’s something downright magical about a meal that feels like a warm hug—and this Chicken Cobbler Casserole brings that magic to the table every single time. Whether you’re cooking for family, friends, or just yourself on a rainy Tuesday, it’s the kind of dish that soothes the soul and fills the belly without fuss. I love how it turns pantry staples into pure comfort with barely any effort—just layer, bake, and let the oven do the work. It’s a go-to in my house, and I hope it becomes one in yours too. Here’s to cozy nights, golden biscuit tops, and second helpings.


