Crispy & Clever: How Cottage Cheese Chips Became My Guilty-Free Obsession
Picture this: You’re knee-deep in snack cravings, caught somewhere between demolishing a family-sized bag of potato chips and sticking to your hard-won protein goals. You’ve opened the fridge five times in ten minutes, hoping a healthy-yet-delicious option will magically appear. And then—you spot it. That humble tub of cottage cheese. Yes, cottage cheese.
It may not scream “snack time hero,” but hear me out: when you blend it, season it, and bake it into golden, crunchy chips, it becomes a protein-packed powerhouse. These chips are dippable, stackable, crackly little miracles. I’m talking golden edges, a light, crispy bite, and a protein profile that your macro tracker will applaud.
As someone who has burned more snacks than I’d like to admit, this recipe changed my entire relationship with snacking. Not only do these cottage cheese chips come together with minimal ingredients and equipment, but they also deliver on crunch, flavor, and satisfaction—all without the post-snack guilt. Ready to turn that unassuming tub of cottage cheese into your new secret weapon? Let’s do it.
Cottage Cheese Chips
The Day My Freezer Saved My Snack Life
Let’s rewind to 2020, mid-pandemic, when everyone was trying their hand at banana bread and Dalgona coffee. My tiny NYC apartment kitchen looked more like a lab experiment than a food haven. I was deep into “healthy snacks” territory and convinced that there had to be a better way to curb cravings without sacrificing flavor or my fitness goals.
My first attempt at healthy chips involved chickpeas. Spoiler alert: they exploded. Then I tried kale. It burned. Carrot chips? Soggy. My snack confidence was plummeting fast. Just when I was about to throw in the towel, I spotted a tub of cottage cheese hiding in the back of the fridge—the same one I’d optimistically bought for smoothies weeks before and promptly forgotten.
“What if I bake this?” I wondered aloud. My roommate gave me a skeptical side-eye but humored me. I whipped it in a blender, added some garlic powder, onion powder, and chili flakes, and spooned little circles onto parchment paper. The first batch stuck like glue. The second batch was chewy. The third? Magic.
They came out golden and crisp with a crunch that rivaled the best kettle chips. I held up a chip in triumph just as my roommate walked into the kitchen. Her reaction? “Are you eating cottage cheese like it’s Doritos?” She took one bite, then stole the entire tray. That’s when I knew I was onto something.
What You’ll Need to Make Cottage Cheese Chips
The best part about cottage cheese chips is that they require just a few pantry staples and a little imagination. Here’s everything:
-
1 cup cottage cheese (Full-fat, please! It crisps up better than low-fat versions. If you’re dairy-free, try Kite Hill’s almond milk cottage cheese—it works beautifully.)
-
Garlic powder + onion powder: This dynamic duo brings that classic savory flavor without adding moisture, which is key for crisp chips.
-
Chili flakes or smoked paprika: Want to mimic spicy chips or go for that smoky BBQ flavor? These are your MVPs.
-
Optional spice variations: Not a ranch fan? Try everything bagel seasoning, nutritional yeast for cheesy depth, or taco seasoning for Tex-Mex flair.
These ingredients are endlessly customizable. You can make them spicy, herby, cheesy, or savory, depending on what you’re in the mood for. Once you master the base recipe, the possibilities are endless.
How to Make Cottage Cheese Chips (Without the Mess)
Making these chips is a simple four-step process that’ll have you munching in under an hour.
Step 1: Preheat your oven to 375°F (190°C).
If you don’t have parchment paper, make sure you grease your pan really well. A silicone baking mat works wonders for an easy chip-flipping experience.
Step 2: Blend the cottage cheese until silky smooth.
This step is crucial—lumpy cottage cheese won’t crisp up evenly. Use a blender or food processor to whip it into a creamy, pourable texture. Think “smoothie,” not “ricotta.”
Step 3: Drop teaspoon-sized rounds onto your prepared baking sheet.
These will spread slightly, so give them some space. Wet your spoon between scoops to avoid sticking. Think of yourself as a snack version of Jackson Pollock—just a little more precise.
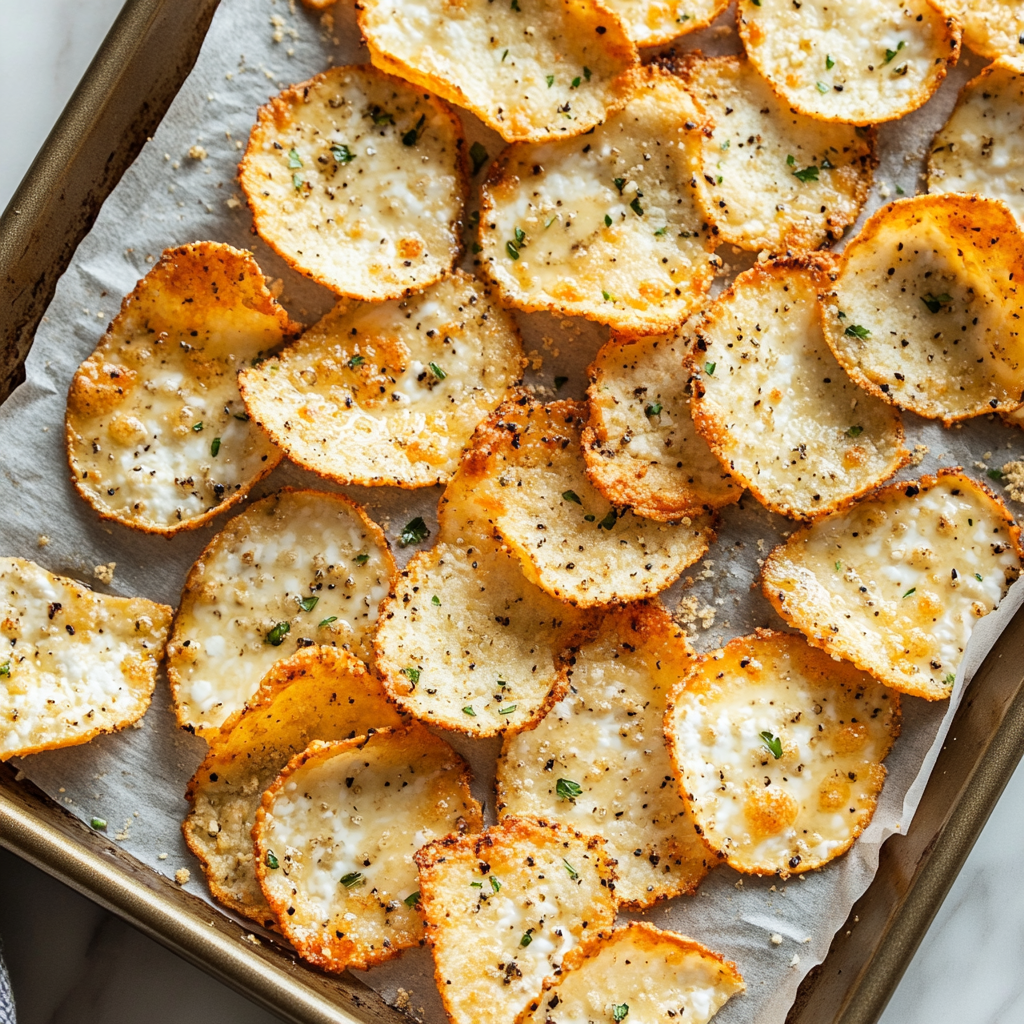
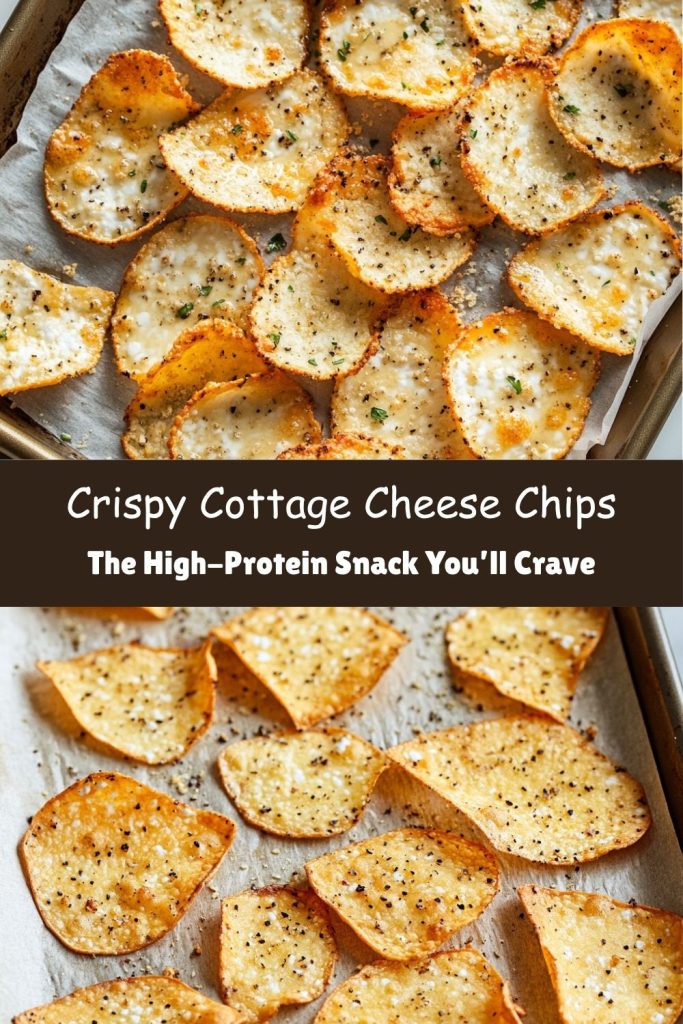
Step 4: Bake for 25–30 minutes, until the edges turn golden-brown.
Resist the urge to overbake! The chips will firm up as they cool. If you pull them too soon, they’ll be chewy. If you go too long, they’ll be bitter. That sweet spot? Right when the edges start browning.
Serve Cottage Cheese Chips Like a Pro
Once your chips are out of the oven and fully cooled (don’t skip the cooling—they really crisp up as they rest), it’s time to snack like a pro.
Pile them in a bowl with guacamole, salsa, or hummus. They hold up like champions and scoop with flair. Or crumble them over your favorite salad as a crouton alternative for a protein-packed crunch.
Want to level up your midnight snack game? Try this: layer cottage cheese chips with sliced turkey, pickles, and mustard for the world’s crunchiest no-bread roll-up. It’s weirdly satisfying and way better than raiding the chip bag again.
Switch It Up!
These Cottage Cheese Chips are a blank canvas. Once you get the base recipe down, it’s time to experiment. Here are a few of my favorite variations:
Pizza Party:
Add dried oregano, tomato powder, and a pinch of grated parmesan. Serve with marinara for dipping.
Sweet Tooth:
Mix in cinnamon and a touch of vanilla protein powder. After baking, dust with monk fruit or stevia for a sweet chip with a breakfast-y twist.
Keto MVP:
Mix in 1 tablespoon of psyllium husk for extra fiber and crisp factor. Great for those following a low-carb or keto lifestyle.
Umami Overload:
Try mushroom powder, miso seasoning, or a pinch of soy sauce powder for a savory, deeply satisfying chip.
The great thing is, once you’ve got the hang of baking these, you’ll start dreaming up your own flavor combinations. Cottage cheese chip nachos? Done it. Spicy taco chip salad topper? Weekly ritual. The flavor world is your oyster.
Confessions of a Chip Addict
Okay, confession time: I once tried to make these using blueberry-flavored cottage cheese. It was… a mistake. The sugar content caused them to burn and bubble in a weird way, and the smell? Not ideal.
Another time, I got cocky and spread them way too thick. The result? Chewy, bendy discs that were more like sad pancakes than chips. The key lesson? Spread them thin and even. Like gossip.
Also, let them cool completely before touching. I know it’s hard. I’ve burned my fingertips and crumbled more than one chip out of impatience. But just like teenagers, these chips need a little space before they’re ready to shine.
Now? I batch-make these every Sunday and store them in a sealed container. They last up to five days—if you can resist eating them all in one sitting. I even travel with them, sneaking them into Ziplocs for car rides and airport snacks. They’re that good.
Chip SOS: Answered!
Here are some common troubleshooting tips for chip success:
“Mine came out chewy!”
That usually means they were too thick. Use a teaspoon, not a tablespoon, and spread the rounds thin and even.
“My seasonings burned!”
Some spices (especially garlic and paprika) are sensitive to high heat. Try adding them in the last 10 minutes of baking or mix them in post-bake.
“Can I air-fry them?”
Yes! Set your air fryer to 350°F and cook for 12–15 minutes. But keep an eye on them—they cook quickly and can go from perfect to overdone fast.
“They stuck to the pan!”
Always use parchment or a silicone mat. If you must go without, grease your tray well and be patient when removing them.
“Can I double the batch?”
Absolutely. Just make sure not to crowd the pan. Bake in batches if needed. The chips need room to breathe for even crisping.